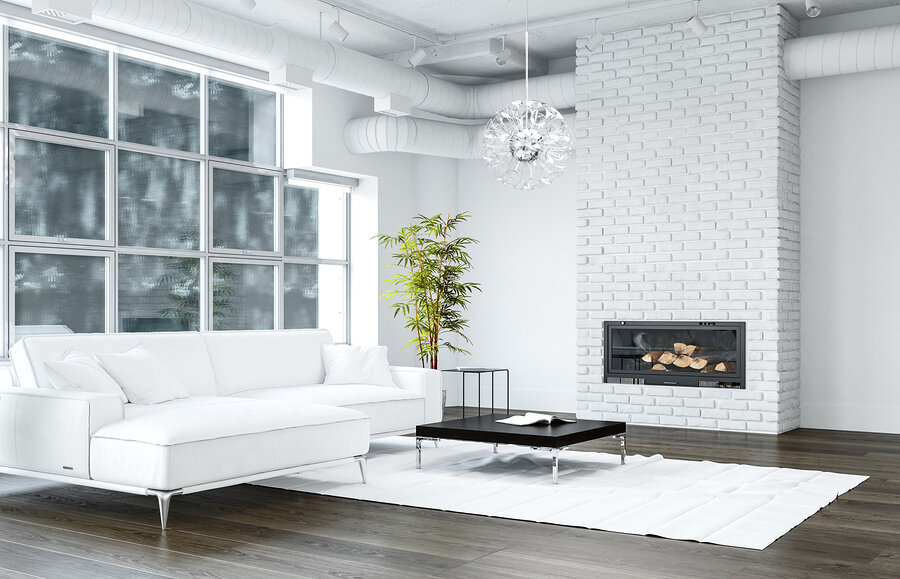
Whitewashing Is An Easy DIY Project!
As we looked at in 4 Steps For Preparing to Whitewash Anything, whitewashing is a simple, relatively inexpensive, and chic way to update your home. Whitewash paint creates a protective covering on materials than can make them last longer. You can whitewash brick and wood, meaning fireplaces, furniture, and accent walls are ideal candidates for this easy DIY project. Once you have decided what to decorate and have all the materials for it, here is how to whitewash.
How to Whitewash Anything
How to Whitewash Brick
If you’re whitewashing brick, such as a fireplace, you’ll need to wash it first. Soap and water should do the trick, or a power washer for exteriors. Brick collects dirt and grime in all of its crevices, so you’ll want to clean it, but moisture can lead to cracks, so be sure that the brick dries before you paint over it. If your brick has been painted on before, you may need to remove that paint in order for the whitewash to stick better. If this is the case, do further research to make sure you can remove the paint safely. It’s particularly important in older houses to make sure the preexisting paint isn’t toxic, so be cautious and always wear a face mask and goggles when removing old paint.
When considering materials, you can either buy whitewash paint or make your own with white paint and water. The more water you add, the thinner and more distressed the final product will look. Brick is very absorbent, so you may need to paint several layers for the whitewash to reach the desired thickness.
2. How to Whitewash wood
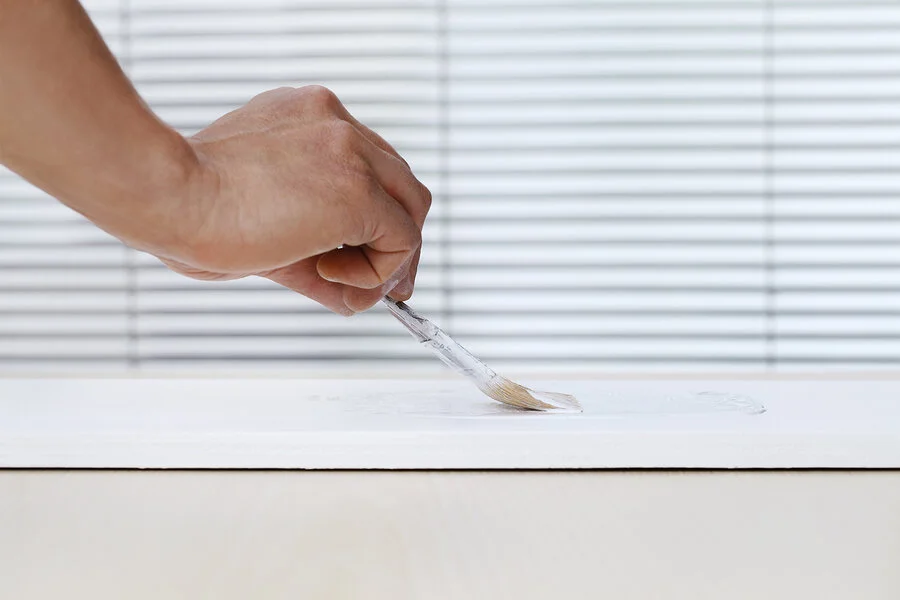
When whitewashing a piece of wood, you may need to strip any previous sealant off. Do further research based on the material of the item to determine the best way to do this. Often it means sanding down the wood beforehand so the paint will stick better. Once the surface has been prepared, wipe down the wood so it’s clean and dry. Then, it’s time to paint! You can use brushes or even rags to paint, depending on the texture you want. A clean, uniform look can be achieved by making sure the whole surface is covered in equal brush strokes, or you can make a weathered, more relaxed look by applying the paint more freely.
3. How to Seal whitewash
Allow the surface to dry between each layer of paint. If you’re whitewashing wood, the final step is to finish it off with the water-based protective sealant to help preserve the paint job for years to come. Once you’ve finished your project, it’s time to display it! A whitewashed piece of furniture can be a great statement piece in a room you’ve staged for selling, whether you’re going for a crisp minimalist look or sprucing up a vintage piece.